Install and activate your eSIM on iPhone


01. Install your data plan
The installation process will start automatically when you scan the QR code on your iPhone.
Click on Continue
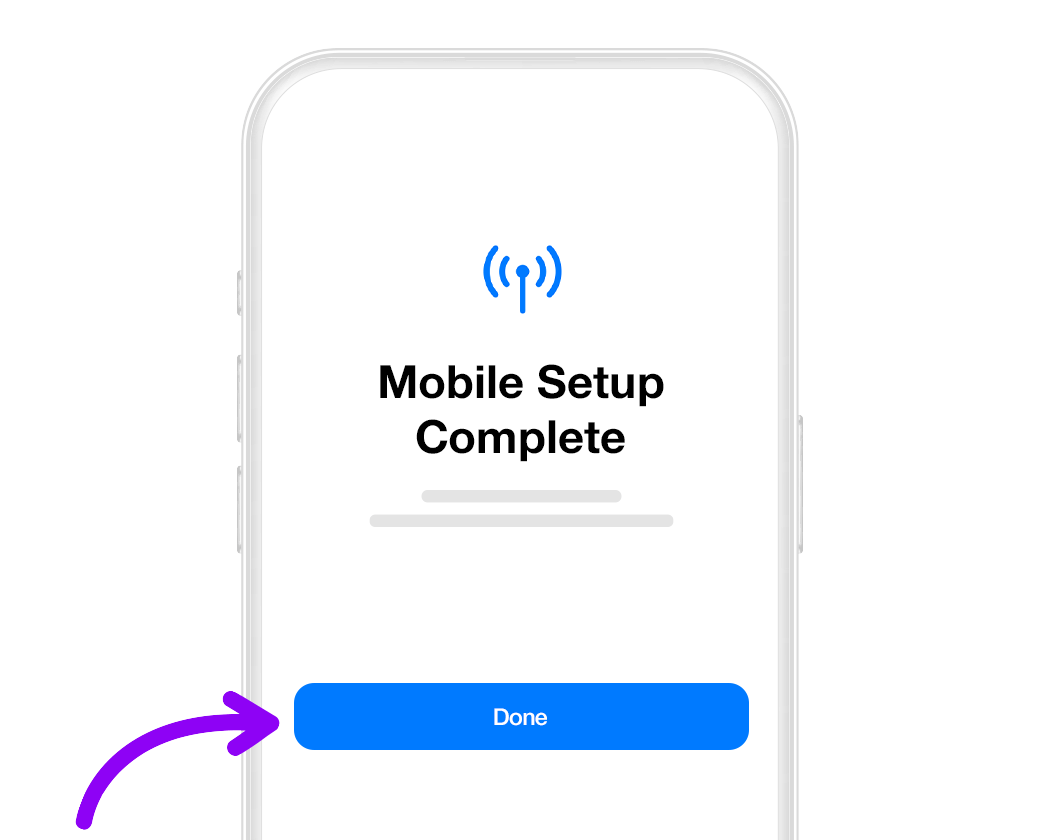
02. Mobile configuration completed
Your plan has now been installed.
Click on Done
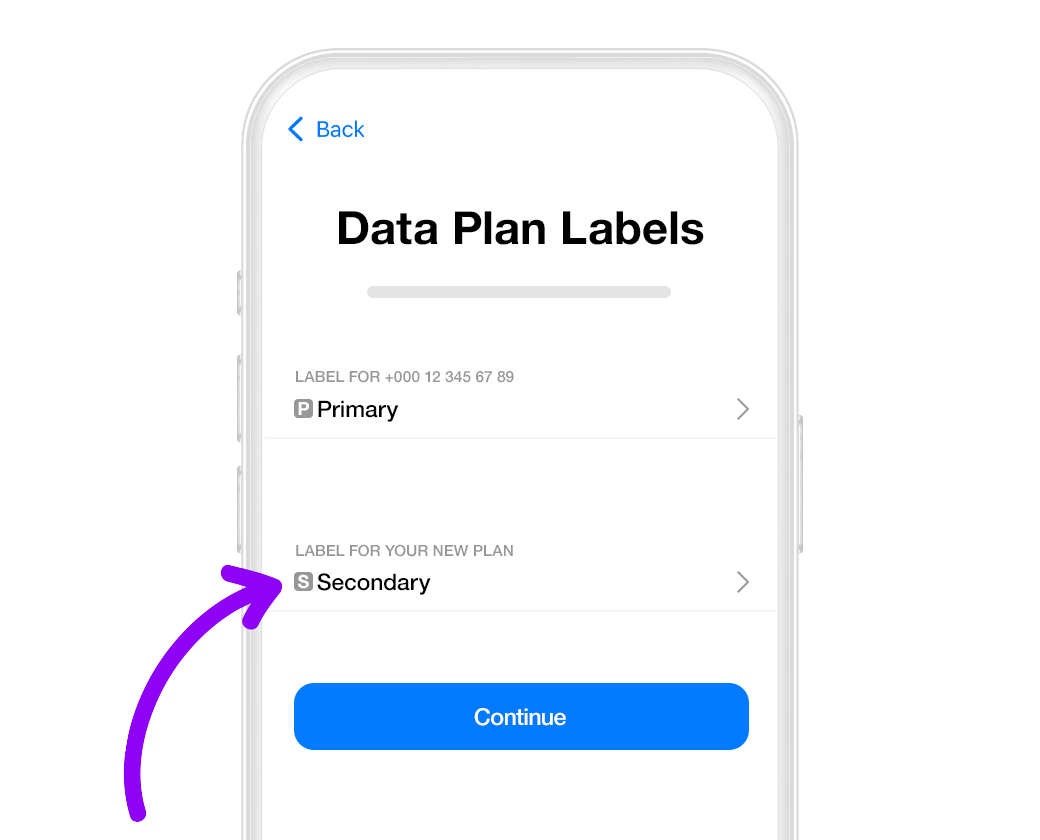
03. Label your data plan
Give your new Snap eSIM line a name to identify it. For example: “Snap eSIM”.
Click on Continue
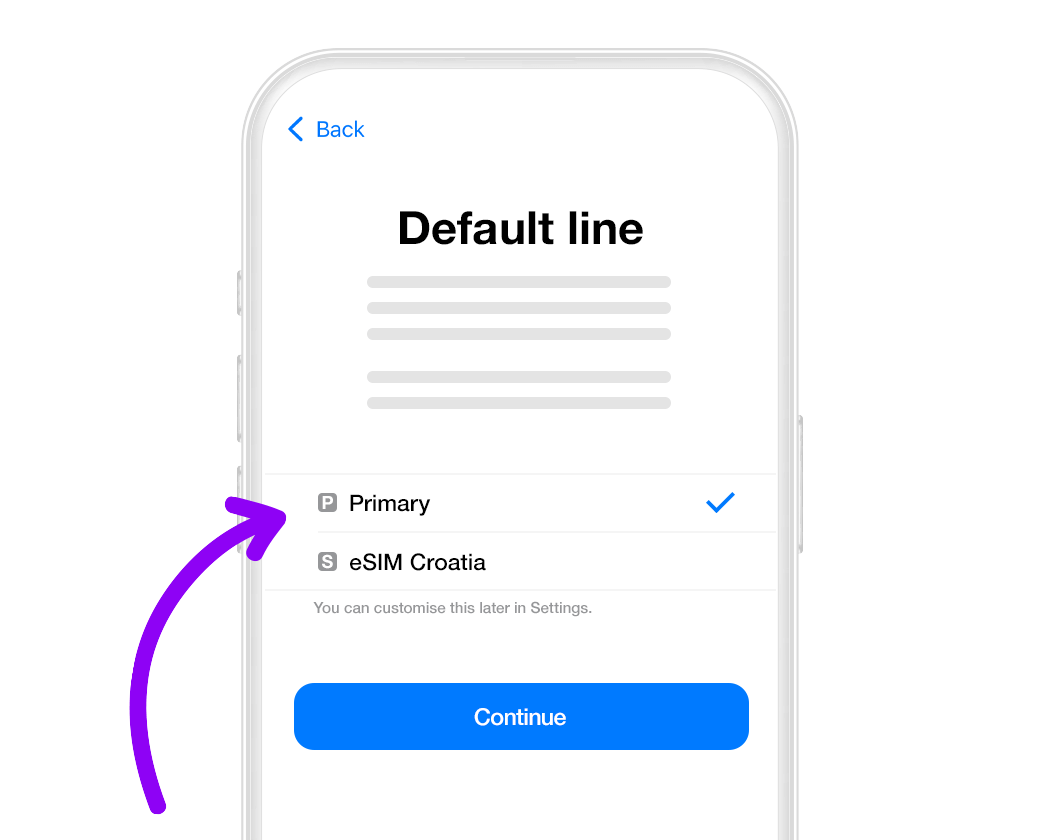
04. Choose your default line
Select the “Primary” option to continue using your number to receive messages and calls.
Click on Continue

05. iMessage and FaceTime
Select the “Primary” option to continue using your number for iMessage and FaceTime.
Click on Continue
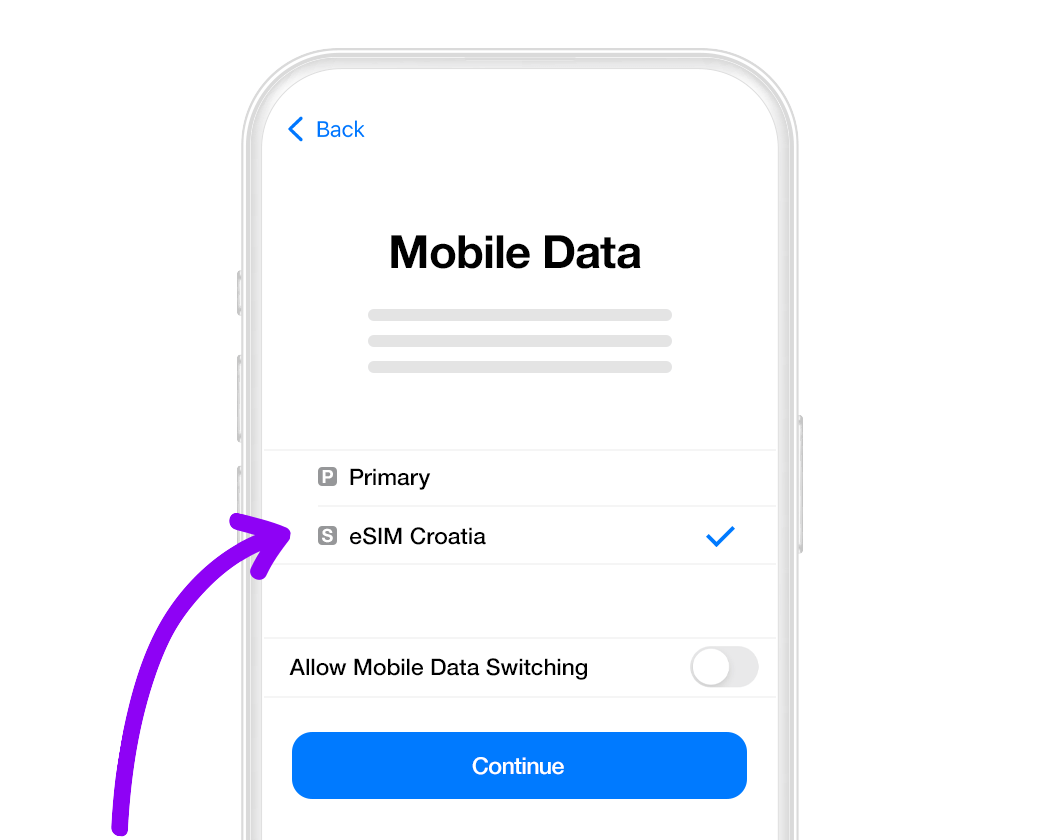
06. Mobile data
Select the “Secondary” option.
Keep “Allow Mobile Data Switching” turned off to avoid additional roaming charges.
Click on Continue
Activation guide for your eSIM
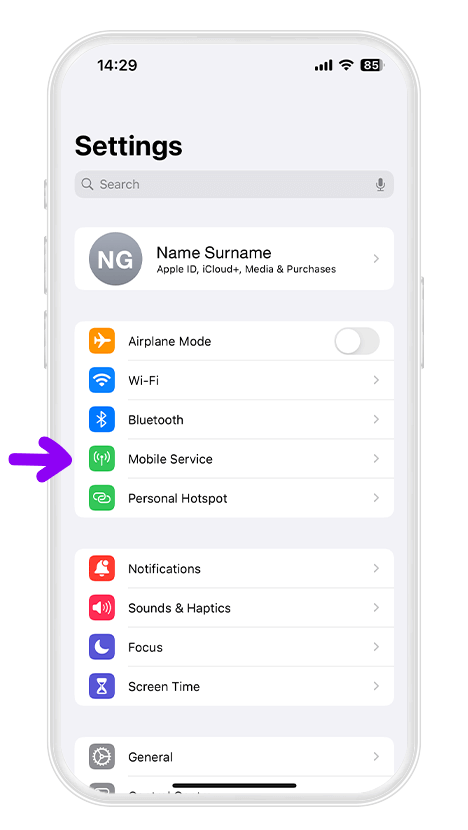
Open“Settings”on your iPhone and select“Mobile Data”
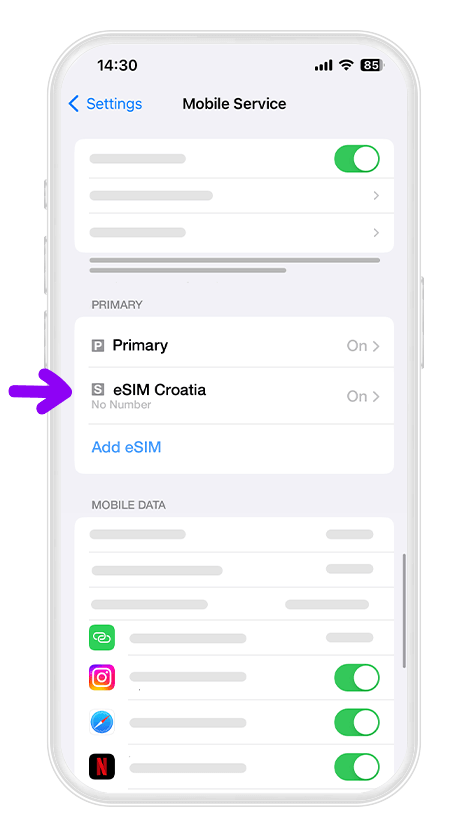
Select the SnapeSIM option
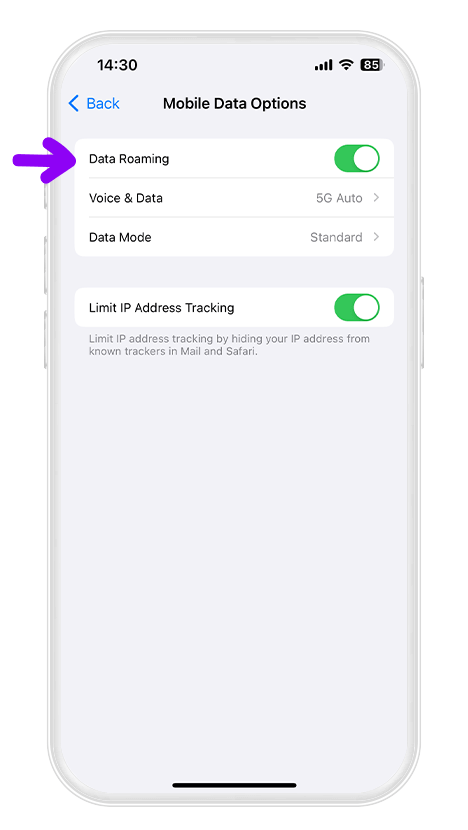
Scroll down until you find“Data Roaming”and turn it on.
